
If you need to scan a document, most modern smartphones can do this using the built-in camera, including the Samsung Galaxy S10.
The Galaxy S10 has the feature built-in to scan documents and save them as a PDF or other format such as JPEG.
The option to scan documents is usually enabled by default but maybe off and need to be turned on with the steps below.
After the document is scanned, there are many editing tools that can be used if needed to adjust the image if needed.
How to Scan Documents with a Samsung Galaxy S10
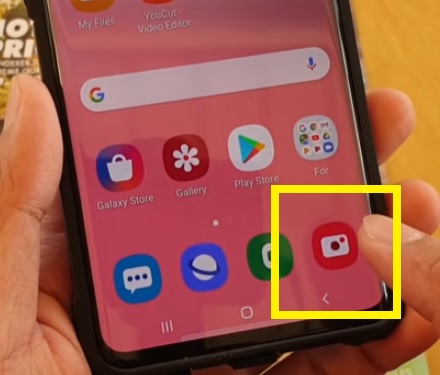
- Open the Camera App.
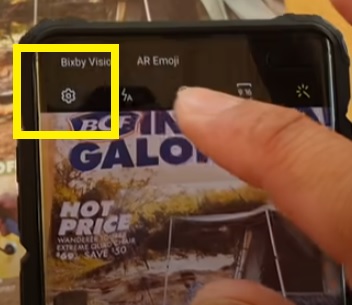
- Select the Settings Icon at the top left.
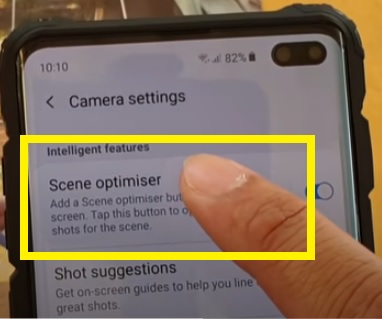
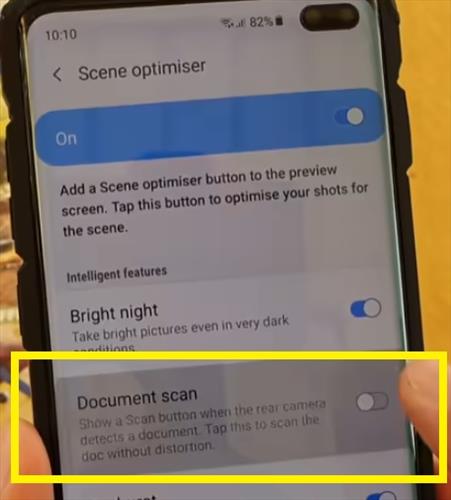
- Select Scene Optimizer.
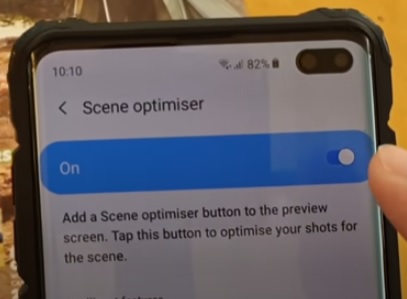
- Be sure Scene Optimizer is turned on and enabled.
- Scroll down and be sure Document Scan is enabled.
- Go back to the and camera app and hold it over the document.
- Move the camera around and tap on the scan button when the document is selected correctly.
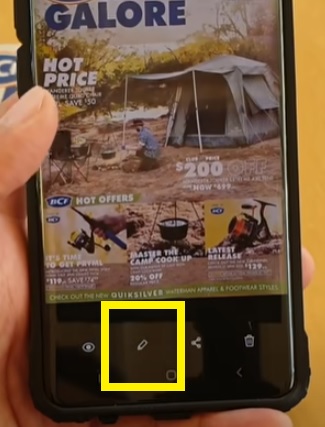
- After the document is scanned, select at the bottom left the Edit Button.
- Select the Pencil Icon edit button
- There are many editing tools that can adjust the image if needed. Click on Save when done.
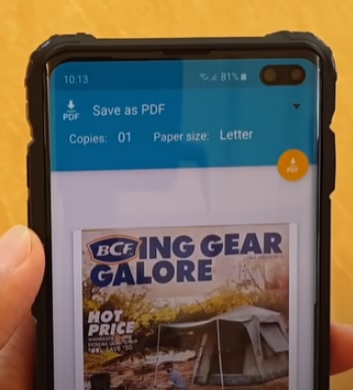
- The image will be saved to Gallery app on the phone, which has many more features such as saving as PDF.

Editing and Saving Scan Documents with a Samsung Galaxy S10


Summary
Scanning a document with a Galaxy S10 is quick and easy to do and can is a very handy feature.
The smartphone’s camera is used to take a picture of the item and then edited to make the quality the best it can be.
When taking a picture, a yellow line will bounce around the document, and the phone will need to be moved about until the yellow line captures the best image.
Editing the image, such as cropping or cutting a section, can be done with the editing tools, and then the item can be saved.
Once it is saved, it will be located inside the Galley app, which has more editing options such as save as PDF and more.
Have you had any issues using the Galaxy S10 to scan documents? Let us know in the comments below.